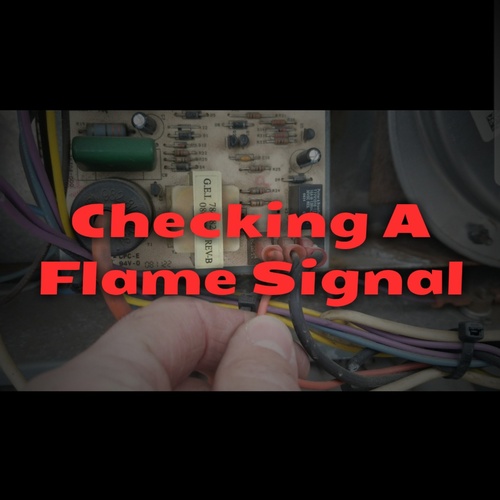
Key Takeaways
- Flame Rectification: Modern gas appliances use flame rectification to convert AC signals to DC current (2-7 micro amps) for safety verification
- Essential Tools: You’ll need a multimeter with micro amp settings and alligator clip leads for accurate and safe testing
- Safety First: Always test flame signals before main burner ignition to prevent dangerous gas accumulation
- Diagnostic Range: Residential and small commercial systems typically show 2-7 micro amps when functioning properly
Understanding Flame Rectification in Modern Gas Appliances
Most gas-fired appliances today rely on flame rectification as a critical safety feature to prove pilot flame presence before allowing the main burner to ignite. This technology has become the industry standard for good reason – it provides reliable, fast-acting flame verification that prevents dangerous gas accumulation.
Flame rectification is the process that uses the flame itself to convert an AC signal into a DC current measured in micro amps. Think of it as the flame acting like a one-way electrical valve, allowing current to flow in only one direction. This creates a measurable DC signal that your control board can interpret as proof of flame.
Why Flame Signal Testing Matters
Before diving into the testing procedure, it’s important to understand why this diagnostic skill is essential. A weak or absent flame signal can cause:
- Intermittent lockouts during heating season
- No-heat calls that frustrate customers
- Safety shutdowns that protect against gas accumulation
- Premature component failure from repeated ignition attempts
Just like understanding proper maintenance scheduling for heating systems, mastering flame signal diagnostics helps you prevent winter emergencies and keep customers comfortable.
Tools You’ll Need for Accurate Testing
Testing flame signals requires specific equipment and the right approach. Here’s what you’ll need:
- Digital Multimeter with Micro Amp Setting: Not all meters have this capability – verify yours can measure in the micro amp range
- Alligator Clip Test Leads: These make testing significantly easier and safer by providing secure connections
- Safety Equipment: Always wear appropriate PPE when working with gas appliances
- System Documentation: Keep manufacturer specifications handy for reference ranges
Step-by-Step Flame Signal Testing Procedure
There’s a specific method to test flame signal strength that ensures accurate readings and safe operation. The video below demonstrates the complete process in detail:
Testing Process Overview
- Set Your Meter: Switch to the micro amp (µA) DC setting
- Connect in Series: Place your meter in series with the flame sensor wire
- Initiate Call for Heat: Start the heating cycle to establish flame
- Read and Record: Note the micro amp reading once flame is established
- Compare to Specifications: Verify reading falls within manufacturer’s range
Understanding Your Readings
In most cases, residential and small commercial applications will show flame signals between 2-7 micro amps. However, these readings can tell you more than just pass/fail:
- 5-7 µA: Strong, healthy flame signal
- 3-5 µA: Acceptable but monitor for degradation
- 2-3 µA: Marginal – consider cleaning or replacement
- Below 2 µA: Weak signal requiring immediate attention
- 0 µA: No flame detection – troubleshoot sensor or grounding
Common Issues Affecting Flame Signal
When you encounter weak or erratic flame signals, several factors could be at play:
Sensor Contamination
Carbon buildup on the flame sensor is the most common culprit. Regular cleaning with fine steel wool or emery cloth often restores proper operation.
Grounding Problems
The control board needs a solid ground reference to measure the rectified current. Check all ground connections, especially on older equipment where corrosion may have developed.
Positioning Issues
The sensor must be properly positioned in the flame envelope. Even slight misalignment can cause weak or intermittent signals.
Component Degradation
Over time, flame sensors can crack or deteriorate. If cleaning doesn’t improve the signal, replacement may be necessary.
Integrating Flame Diagnostics into Your Service Routine
Mastering flame signal testing is just one aspect of comprehensive heating system diagnostics. When combined with understanding control system fundamentals and proper troubleshooting techniques, you’ll be equipped to handle even complex heating issues efficiently.
Speaking of efficiency, Property.com’s ‘Know Before You Go‘ tool helps you prepare for service calls by providing homeowner permit history and equipment age before you arrive. This means you can bring the right flame sensors and parts on the first visit. Learn how Property.com helps HVAC pros reduce callbacks and improve first-call resolution rates.
Best Practices for Flame Signal Testing
To ensure accurate diagnostics and customer satisfaction:
- Test During Regular Maintenance: Include flame signal checks in your seasonal maintenance procedures to catch issues before they cause failures
- Document Your Readings: Keep records of flame signal strength to track degradation over time
- Educate Customers: Explain how this safety feature protects their home and family
- Stock Common Sensors: Keep popular flame sensor models on your truck for quick replacements
Troubleshooting Tips from the Field
After years of diagnosing flame signal issues, here are some pro tips that can save you time:
- Always check the simple things first – loose connections cause more problems than you’d expect
- Use your alligator clips to ensure stable readings – handheld probes can give erratic results
- If readings fluctuate, check for drafts affecting the flame pattern
- On newer high-efficiency units, consult manufacturer specs as some require higher micro amp readings
Conclusion
Flame rectification testing is a fundamental diagnostic skill that every HVAC technician should master. With the right tools, proper technique, and understanding of what the readings mean, you can quickly diagnose and resolve flame-proving issues. Remember that consistent readings between 2-7 micro amps indicate proper operation for most residential and small commercial applications.
By incorporating flame signal testing into your regular service routine and understanding how it fits into the broader context of heating system controls, you’ll provide better service and prevent those dreaded no-heat calls during the coldest days of winter.


