Armstrong is the world leader in “Fluid Technology”, when it comes to hydronic systems they are second to none. Check out the first fifteen of thirty tips put together by the good people at Armstrong and check out armstrongfluidtechnology.com for more info.
Tip #1
If you are changing out a mechanical seal, be sure to check the makeup of the system fluid. For glycol mixtures greater than 30% concentration by volume, Silicon Carbide is recommended for both seal faces.

Tip #2
If pump seal failures occur regularly, consider installing a filter, with flow indicator in the seal flush line(s). The filter will trap sediment that may be causing the seal failures. Ensure that operators check the flow indicator regularly and change the filter when seal flow decreases. Pumps with differential pressures above 30psig [Between inlet and outlet pressure gauges], may use a sediment separator, which will not require monitoring.

Tip #3
For an older Armstrong S&H circulator, you don’t necessarily have to replace it with new. You can service it effectively using the Armstrong Seal Bearing Assembly. The Armstrong SBA universal seal bearing assembly contains an interchangeable module that includes a pump shaft, sleeve bearing, copper sleeve and donut wicking system. With as few as five types of seal bearing assemblies more than 100 different Armstrong and B&G pump models can be converted to this module program during routine maintenance. Once the conversion is made, future maintenance will normally require replacement of the module only.

Tip #4
Did you know an Armstrong vertical inline pump can be fully supported by the piping without a base, inertia pad, springs or rubber isolators or pump stands. If you are installing an Armstrong vertical inline pump you can save the labor and cost of installing supports.

Tip #5
Horizontal pumps with flexible couplings should have their pump and motor shafts realigned on site prior to start-up in case they become misaligned during shipment. However, Vertical and horizontal split coupled pumps with rigid aluminum couplings do not need realignment on site.

Tip #6
If you see horizontal circulators with supports under the motor, be sure to mention it as a problem. Propping up the motor from below or suspending the motor from above will cause misalignment and bearing or seal failure.

Tip #7
If you need a commercial pump to deliver more or less flow the controls for Design Envelope pumps can be accessed and adjusted on the spot. Armstrong Design Envelope pump controls display the actual system flow & head right at the pump. The most recent Generation 5 pumps can be controlled via Wi-Fi connection using your smart phone or tablet. This is super convenient for situations where the pump is installed up high or in an inconvenient spot.

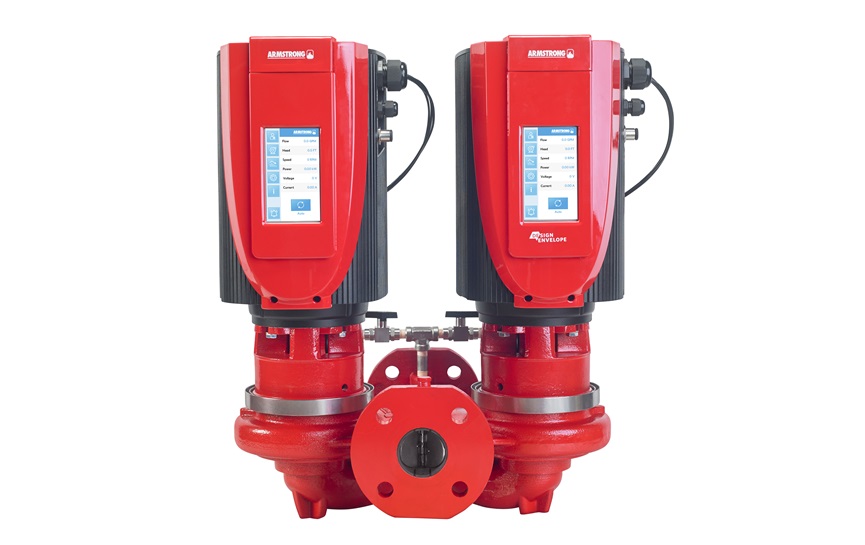
Tip #8
If you get in a situation where you need more flow and there is no room for another pump and piping, consider dual-head pumps, where 2-pump rotating assemblies fit in a casing design to operate in a single pipe. The pump heads may be operated alone or together for double flow or, with integrated controls, which will operate each unit, bringing the second unit online to optimize the unit efficiency for lower power costs.

Tip #9
DO NOT remove equipment nameplates. This may have felt necessary in the past, though cell phones can now do a better job for the capturing the data and able to transfer the image to service personnel to confirm the pump ID and / or spare parts

Tip #10
IF you cannot find the equipment nameplate, be sure to check the volute as the pump information may be stamped on the volute.

Tip #11
Bladder expansion tanks and AX series diaphragm tanks can be mounted horizontally with saddles under the weld seams. If the system connection is off-center, the tank should be rotated to have the system connection above the centerline.

Tip #12
Air charge on a bladder or diaphragm tank should be set to 2-5 psi above the cold fill system pressure. This air charge should be applied prior to connecting the tank to the system.

Tip #13
Increased seismic activity across North America require seismic clips on the base ring on some vertically mounted expansion tanks.

Tip #14
To ensure that a plate and frame heat exchanger operates properly, check that the system connections are for countercurrent flow. This means that two inlet connections should be on opposite corners to each other. The outlet will always be above or below the inlet, never beside.

Tip #15
When starting a new system, be sure to shut down after 24 hours to open the suction guide and remove the fine mesh start-up strainer from the steel basket strainer. Continued operation with the mesh filter will eventually starve the pump of suction pressure, causing cavitation and seal damage.