What Is an Economizer in HVAC?
Simply put, it is a mechanical device that is designed to reduce the consumption of energy, whether it be fuel, electricity, or other.
According to Wikipedia, the first economizer was patented by Edward Green in 1845. It was used to increase the efficiency of stationary steam boilers.
In this article, the discussion will revolve around air-side economizers.
You will typically see them as an accessory built into rooftop units used for the purpose of “free cooling”.
Free cooling is a funny term because it’s not actually “free”, the fan motor and economizer controls must be powered in order to operate, which consumes energy.
The term merely demonstrates the fact that less power consumption is taking place due to the fact we are utilizing outdoor air to cool a space rather than the use of a compressor or compressors.
Economizers also offer the added feature of providing fresh air to the building and its occupants.
A carbon dioxide sensor can be integrated into the setup.
As CO2 levels increase within the building, the outdoor air dampers are commanded to open, filling the space with fresh air.
As CO2 levels drop off, the dampers return to their minimum position.
The Guts of an Economizer
The economizer setup employs several parts in order to operate correctly.
Outdoor Air Dampers
A Set of outdoor air dampers that are directly linked to the return air dampers are used to control air flow. They move together as one, as the outdoor air dampers begin to open, the return air dampers begin to close and vice versa.
Outdoor Air Sensor
This sensor is responsible for determining if the outdoor air is acceptable for free cooling. In most cases, there will be an option between a sensible temperature sensor or an enthalpy sensor.
Sensible Temp Sensor
Measures dry bulb temperature of the air.
Enthalpy Sensor
Measures heat content within the air measured in btu/lb. This sensor takes dry bulb temperature and wet bulb temperature into account for total heat content.
Indoor Air Sensor
This sensor reads sensible temperatures and is responsible for maintaining mixed or discharge air temperature.
The damper assembly will modulate according to feedback from this sensor to maintain a pre-determined mixed or discharge air set point.
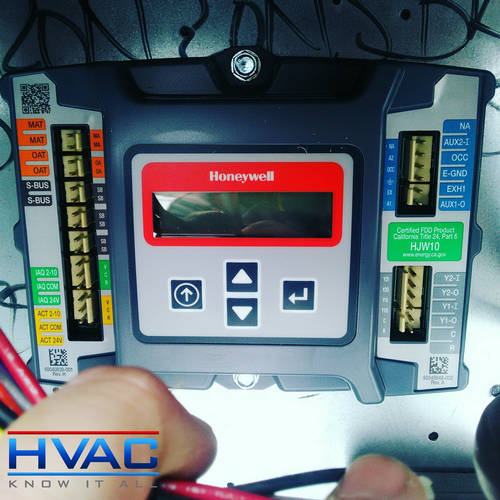
On newer economizer controls, like the Honeywell Jade, for example, you are able to set the mixed or discharge air temperature as desired.
Damper Actuator
The damper actuator, which receives a signal from the economizer control board and moves to the assigned position to maintain the mixed air or discharge air set point.
Barometric Relief Damper or Power Exhaust system.
When using free cooling you must remember that you are introducing fresh air, this added air into the space can cause positive pressure issues within a building.
To alleviate this problem economizers in most cases will have a built-in barometric relief damper or power exhaust system.
Control Board
The control board is the heart and soul of the operation.
The control board receives sensor input signals, internally calculates the next step, and relays the output signals to the damper actuator and power exhaust motor if utilized.
Order of Operations
To keep it simple, the following example will be based on a single-stage cooling rooftop unit complete with an economizer package.
On a call for cooling from the thermostat or BAS (building automation system), the Y1 terminal will be powered.
In most cases, the signal will first move through the rooftop control board and over to the economizer control.
At that point, the economizer control will then decide whether to proceed with free cooling or mechanical cooling based upon the outdoor air conditions either using sensible temperature of the air or the heat content of the air measured in enthalpy.
If the outdoor air is not suitable for free cooling, the control signal will be then relayed back to the main control board of the rooftop and initiate mechanical cooling (compressor operation).
If the outdoor air is suitable for free cooling, the outdoor air dampers will modulate from their minimum position (damper minimum position is set up during commissioning to maintaining constant fresh air to the building and occupants) to maintain the mixed air or discharge air set point until the space temperature is reached.
Once the thermostat or BAS has been satisfied, the call for cooling will cease.
Most air-side economizers in general, work as explained above.
It is best to contact the manufacturer of the equipment you are working on for technical advice or when issues pertaining to that system arise.
📺 Check out this video of an onsite breakdown of a Honeywell Jade Economizer
Finally!
Check out the link to my YouTube channel for more tips, tricks, and troubleshooting videos, and check out The HVAC Know It All podcast here or on your favorite podcast app.
Happy HVACing!